Eyeshadow can truly make your eyes look amazing! Whether you desire a natural look or something more glamorous, this simple guide on Perfect Eyeshadow Techniques will help you apply eyeshadow like a pro. Just follow these steps to enhance your eye makeup skills!
Step 1: Know Your Eye Shape for Perfect Eyeshadow Techniques
Understanding your eye shape is essential because it helps you decide where to apply each shade for the most flattering look. Here’s a closer look at common eye shapes:
Round Eyes
Round eyes are large and open, often with a visible crease. Because of their openness, round eyes work well with darker shades on the outer corners to add definition. This technique slightly elongates the eye shape, creating a stunning effect.
Almond Eyes
Almond eyes have an oval shape with a slightly lifted outer corner. This shape is versatile, as almost any eyeshadow style suits almond eyes. They can beautifully carry winged or smoky looks due to their natural balance and symmetry.
Hooded Eyes
Hooded eyes feature extra skin that hides the crease, making eyeshadow hard to see when your eyes are open. To remedy this, use a darker color just above the crease. This technique adds depth and makes the eyelid appear larger.
Monolid Eyes
Monolid eyes have little to no visible crease. This shape benefits from a gradient effect, using lighter colors on the lid and darker shades along the lash line. This combination adds dimension and helps open up the eyes.
Deep-Set Eyes
Deep-set eyes are positioned deeper in the eye socket, creating a naturally shadowed crease. To bring out deep-set eyes, apply lighter colors on the lid and a medium shade in the crease. This technique adds subtle dimension without creating too much depth.
Upturned Eyes
Upturned eyes resemble almond eyes but have a more noticeable upward tilt at the outer corners. This shape pairs well with winged or cat-eye styles, enhancing the natural lift of the eyes.
Downturned Eyes
Downturned eyes feature a slight downward tilt at the outer corners. To create a lifted look, add a darker shade to the outer corner and blend upwards. This technique will enhance your eye shape beautifully.
By knowing your eye shape, you can choose placement techniques that enhance your natural features and make your eyes stand out.
Step 2: Choose Eyeshadow Colors for Your Eye Color
Choosing the right eyeshadow color can make your eyes truly pop! Each eye color has shades that work best with it. Here’s a simple guide to help you choose:
For Blue Eyes
Blue eyes look great with warm colors. Therefore, try shades like orange, soft brown, or gold. These colors will make blue eyes appear brighter and more vibrant.
For Green Eyes
Green eyes shine with purple or burgundy shades. Dark purples or reddish tones highlight green eyes beautifully, making them more captivating.
For Brown Eyes
Brown eyes are incredibly versatile, as almost any color works! Shades of green, blue, gold, or deep purple look amazing on brown eyes. Thus, pick colors that either match or contrast with your eye color for a stunning effect.
Using the right shades can really bring out your natural eye color, making it pop!
Step 3: Use the Right Brushes for Perfect Eyeshadow Techniques
The right brushes are crucial for achieving a smooth and neat eyeshadow application. Each brush has a specific job. Here’s a quick guide:
Fluffy Brush
A fluffy brush is soft and round. It’s perfect for blending eyeshadow, allowing you to gently mix colors so there are no harsh lines. This gives a smooth and polished look.
Small Round Brush
This small and firm brush helps you add color to specific areas with control. Use it to apply darker colors to the crease or the corners of your eye for precision.
Flat Brush
A flat brush is ideal for applying color on your eyelid. It picks up a lot of color, making it suitable for bold looks. Use it to press eyeshadow onto your eyelid for a bright, eye-catching finish.
With these three brushes, you can create a clean, even eyeshadow look, making it easy to blend and apply color exactly where you want it!
Step 4: Apply Primer First
Always start with a primer to help your eyeshadow stay on longer. It enhances the color and prevents smudging. Therefore, dab a little primer on your eyelids before adding eyeshadow for the best results.
Step 5: Follow the Light-to-Dark Rule for Perfect Eyeshadow Techniques
Using a light-to-dark color scheme makes eyeshadow look smooth and blended, adding depth to your eyes. Here’s an easy way to apply colors from light to dark:
Start with a Light Color
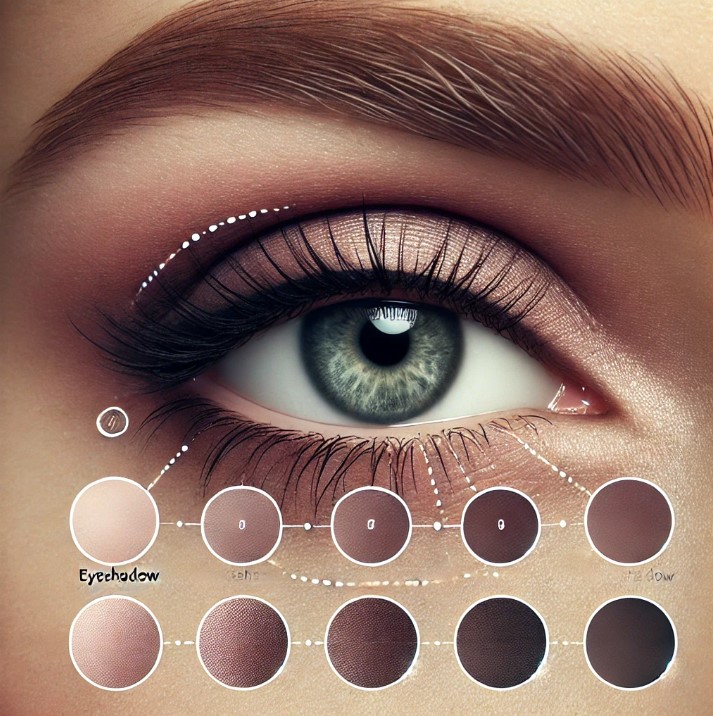
Begin by applying a light shade across your entire eyelid, from the lashes to the crease. This creates a soft base for the other colors.
Add a Medium Color in the Crease
Next, take a medium shade and apply it to the crease, which is the fold between your eyelid and brow bone. This adds shadow and depth, making your eyes look deeper.
Use a Dark Color on the Outer Corner
Finally, apply a dark color to the outer corner of your eye. This technique adds more depth and makes the eyes look bigger. Remember to gently blend the edges for a smooth transition.
By following this light-to-dark rule, you’ll create a layered look that makes your eyes pop!
Step 6: Blend, Blend, Blend
Blending is key! Use a clean brush to blend colors, especially between the crease and eyelid. Blending helps achieve that soft, professional look we all desire.
Extra Tips for the Perfect Look
Here are a few additional tips to enhance your eyeshadow application:
Highlight the Inner Corner
To make your eyes look bright and awake, add a bit of light-colored eyeshadow to the inner corner of each eye. Use a small brush or your fingertip to apply a touch of shimmer. This small step can make a big difference!
Use a Small Amount of Eyeshadow
Start with just a little eyeshadow on your brush. It’s easier to add more if needed than to remove excess product. Using small amounts helps keep the look soft and natural.
Tap Off Extra Eyeshadow
Before applying eyeshadow on your eyelid, gently tap your brush to remove any extra powder. This prevents fallout on your cheeks and maintains a clean look.
These tips will help you control your eyeshadow application and achieve a fresh, polished finish!
Common Mistakes to Avoid in Perfect Eyeshadow Techniques
When applying eyeshadow, a few small mistakes can drastically change the outcome. Here are some common mistakes and how to avoid them:
Using Too Much Eyeshadow
It’s easy to overapply product. However, a little eyeshadow goes a long way! Start with a small amount and add more if needed to maintain a soft, blendable look.
Skipping Primer
Primer is incredibly helpful, as it keeps your eyeshadow on longer and prevents fading. Without primer, eyeshadow can smudge or wear off. Always apply a thin layer of primer to your eyelids before eyeshadow.
Forgetting the Lower Lid
Adding a little color to the lower lid completes your look. It balances the eyeshadow on top, giving a finished appearance. Use a small brush to apply a light color or gently line the lower lid with a medium shade.
By following these simple tips, you’ll achieve better results and a fantastic eyeshadow look. Remember, practice makes perfect, so enjoy experimenting with new colors and styles!


Leave a Reply